Last updated October 15, 2026
Home Addition Contractor Maintenance Checklist for San Diego Homeowners
Most post-construction maintenance guides are written for the Midwest. They fixate on freeze-thaw cycles, snow loads, and ice dams. San Diego’s lack of hard freezes lulls homeowners into skipping the checks that actually matter here: UV-driven caulk degradation that turns hairline gaps into water channels, salt-air fastener corrosion in coastal zip codes like La Jolla and Point Loma, and the roof-to-wall flashing that takes its worst beating not in some blizzard, but during the December atmospheric rivers that dump half our annual rainfall in three weeks. This guide is organized by what your addition is made of, not by season. You’ll learn exactly what to inspect, when to inspect it, and what to photograph so that if something fails, your warranty claim isn’t a negotiation.
Quick Answer
A home addition maintenance checklist in San Diego centers on four inspection points: exterior caulk and paint at every material joint, roof flashing and any low-slope roof surfaces, drainage and grading around the new foundation, and the connection seam where the addition meets the original house. In coastal neighborhoods, add an annual check of exposed fasteners and metal fixtures for salt-air corrosion. Most failures we see show up in year three or four, and they trace back to a skipped check in year one.
Table of Contents
- Material-Specific Maintenance: Stucco, Fiber Cement, Wood, and Low-Slope Roofing
- The Coastal Corrosion Checklist for Additions Within 1 Mile of the Ocean
- Inspecting the Addition-to-Original-Home Connection Seam
- Drainage and Grading for San Diego’s Wet Season
- What to Photograph and File After Construction Ends
- A Practical Year-Round Maintenance Schedule for San Diego
- Common Mistakes to Avoid
Material-Specific Maintenance: Stucco, Fiber Cement, Wood, and Low-Slope Roofing
Your addition’s maintenance schedule depends less on the calendar and more on what it’s made of. San Diego’s climate treats each material differently. Here’s what actually happens to each one here, and when you need to look at it.
Stucco
Stucco is the most common exterior on San Diego additions, and it fails in predictable ways here. The stucco itself is durable. What fails is the caulk at every penetration: window frames, door frames, exterior light fixtures, hose bibs, and the line where stucco meets a different material like wood trim or a concrete foundation.
San Diego’s UV index is consistently high, even in winter. That ultraviolet exposure bakes caulk faster than most homeowners expect. We’ve seen caulk joints at stucco window perimeters shrink to half their original width within two years in high-exposure orientations, especially south- and west-facing walls.
- Inspect caulk joints around all windows and doors in March. Look for shrinkage, cracks, or any gap you can fit a penny’s edge into.
- Look for hairline stucco cracks, especially at wall corners and around window corners. Hairline cracks under 1/16 inch are cosmetic. Wider cracks, or cracks that reappear after patching, need a professional look at the wall’s movement characteristics.
- Check the weep screed if your addition has one, that’s the metal strip near the bottom of stucco walls. Make sure it isn’t buried by soil or mulch, which would trap water in the wall system.
- Repaint stucco every 7 to 10 years, but recaulk every 2 to 3 years. Paint is sunscreen for stucco; it also seals microscopic surface checking that lets water soak into the top coat.
Fiber Cement (James Hardie, etc.)
Fiber cement siding has claimed a large share of San Diego’s home addition market, and for good reason. It resists sun damage better than wood, ignores termites, and takes paint remarkably well. But it still asks for attention. The panels themselves don’t degrade; the joints, caulk lines, and the board ends do.
James Hardie specifies a 1/4-inch gap between board ends and trim, which gets filled with a high-quality exterior caulk. On south-facing San Diego walls, that caulk takes direct sun all day, every day. Follow the same March caulk inspection schedule as stucco. Also check that board ends aren’t wicking moisture where they meet horizontal surfaces like a garage slab or a patio. In our San Diego work, we’ve seen fiber cement board ends absorb water and swell when gutter runoff splashes back against the bottom edge. A simple splash guard or extended downspout fixes it.
Wood Trim and Siding
Wood exteriors on San Diego additions live a different life than wood in other climates. Termites are active year-round here, and the dry rot that takes down wood trim in other climates often starts here as sun damage that opens the paint film. Once paint fails, moisture from coastal fog or the wet season enters, and then the wood has both moisture and a food source for decay fungi.
- Inspect all painted wood surfaces in late September, right before the wet season begins. Fresh paint or caulk applied then has a few dry weeks to cure before rain arrives.
- Look for paint peeling at board ends and along the bottom edges of trim. Those are the first failure points.
- Probe suspect wood with a flathead screwdriver. Healthy wood resists; rotted wood accepts the tip with little pressure. If you find rot, remove and replace the affected piece rather than filling with wood filler, which will hide the problem for about a year.
- Keep any wood siding at least 6 inches above grade. We’ve seen San Diego additions where landscapers raised the soil level after construction, creating a permanent moisture wick into the siding.
Low-Slope Roofing
Many San Diego additions, especially single-story bump-outs and ADUs, use low-slope roofs with rolled roofing, modified bitumen, or a single-ply membrane like TPO. For help selecting the right professional, see our guide on How to Hire a ADU Contractor in San Diego: A Step-by-Step Guide. Low-slope roofs hold water in ways a steep roof never does. Any low spot, leaf pile, or failed seal at a penetration becomes a standing water point, and standing water eventually becomes a leak.
After the first heavy rain of the wet season, go outside and look at your low-slope roof. If you can see standing water that hasn’t drained within 48 hours after the rain stops, you’ve got a sag or a clogged drain. Neither fixes itself. We’ve seen low-slope roof failures on San Diego additions that trace back to a single clogged scupper or a pile of eucalyptus leaves that sat wet for eight months.
A professional roof inspection on a low-slope roof every two years costs a fraction of a roofing repair and catches failed sealant at penetrations, pipe boots that have UV-brittled, and membrane seams that are starting to open.
The Coastal Corrosion Checklist for Additions Within 1 Mile of the Ocean
San Diego’s coastal neighborhoods have a maintenance profile closer to a boat than a standard home. The salt air in places like Ocean Beach, Pacific Beach, La Jolla, Carlsbad, and Coronado accelerates corrosion on every metal surface. If your addition is within about a mile of the ocean, this checklist is your first priority, and it runs on an annual schedule, not an eventual one.
What corrodes first, in our experience:
- Exterior light fixtures: Screws, mounting brackets, and even the fixture housing itself. Salt spray and marine layer moisture combine to eat through powder coating within a few years. Wipe fixtures down with a damp cloth every spring and look for rust bloom around screws and seams.
- Door and window hardware: The stainless hinges and handles on coastal additions are typically not true marine-grade stainless. They’re architectural stainless, which means they resist corrosion better than steel but still pit over time. A light coat of a non-petroleum metal protectant every year makes a measurable difference.
- Exposed fasteners: Check any visible screw heads on downspout brackets, meter panels, gate hardware, and exterior outlets. Rusted fasteners are easy to replace before they snap; snapped fasteners become a repair job.
- Roof flashing: Galvanized flashing has a characteristic life in coastal San Diego, and it’s shorter than the inland life. Look for white zinc blooms or orange rust streaks running down from flashing points after the first rain each year. Streaks on the wall below a flashing point are the early warning.
- HVAC and appliance condenser units: If your addition includes a separate mini-split or AC condenser, its fins and coil surfaces are taking direct salt-air exposure. Coastal HVAC units in San Diego typically see reduced life spans unless they receive regular fins cleaning and coil coating. Budget for this.
If you’re planning an addition in a coastal San Diego zip code, the material choices you make now determine your maintenance load later. For prefab and modular options, we work with several brands that offer coastal-rated material packages. Mighty Buildings and Boxabl both offer panelized systems with corrosion-resistant exterior treatments designed for exactly this environment. Choosing those materials at the start is cheaper than fighting corrosion every year after.
Inspecting the Addition-to-Original-Home Connection Seam
This is the single most common failure point we see after five years on San Diego home additions, and almost nobody talks about it. The connection seam, which is the line where your new addition meets the original house, is a structural and thermal break. It moves differently than either structure on its own. The original house has settled decades ago. The new addition is still settling, moving through its first years of soil consolidation, and responding to a slightly different foundation system. That differential movement concentrates exactly at the seam.
Here’s what to inspect, and how:
- Follow the seam at the roofline. Most additions tie their new roof into the existing roof with a flashing transition. On a sunny day, go into the attic and look along that transition line for daylight pinholes. Then move outside and inspect the flashing for lifted edges, missing sealant, or rust. The seam at the roof is the first place water enters during an atmospheric river, because wind-driven rain moves uphill against flashing in ways that gravity alone never predicts.
- Check the vertical wall seam. If the addition’s exterior wall meets the original home’s wall in a straight butt joint, that joint is sealed with a backer rod and caulk. It needs attention every two years. The caulk will pull away from one side or the other as the structures move. If you catch it before it fully opens, you recaulk. If you miss it, you get water entry into the wall cavity and a repair instead of a maintenance item.
- Inspect the interior drywall at the seam. Inside the house, the addition’s new drywall typically meets the original home’s drywall at the same location. Small vertical hairline cracks here are normal as the addition settles. What’s not normal: a crack that widens over time, a crack that runs at a diagonal, or a crack that reappears after you patch it. Any of those indicates ongoing movement that deserves a foundation professional’s evaluation.
- Check the floor transition. The seam between the new addition’s slab or floor system and the original home’s floor is another movement point. If you see tile grout cracking repeatedly, hardwood boards cupping, or a transition strip that keeps popping free, the two floor systems are moving differentially more than expected. Document it with photos and measurements before you call a professional.
The good news: with regular inspection, this seam is manageable. The bad news: with no inspection, the first sign of trouble is a stain on the ceiling or a musty smell in the wall cavity, and by then the repair cost has multiplied.
Drainage and Grading for San Diego’s Wet Season
San Diego gets nearly all of its rainfall between November and March, and a single atmospheric river can drop more water in one day than the previous six months combined. Your addition’s drainage system either handles that concentrated load or it doesn’t. There’s no partial credit.
The key concept is that your addition creates new roof area and new hard surfaces. Before the addition, that water fell on open soil or ran off in a predictable pattern. After the addition, all of it needs to be deliberately routed away from the foundation. The original home’s drainage patterns have also changed, because the addition’s roof often feeds water onto the original roof, and the addition’s walls sometimes block existing drainage paths.
Here’s the drainage checklist, best done in late October before the first major rain:
- Walk the entire perimeter of the addition. The soil should slope away from the foundation at a drop of at least 6 inches over the first 10 feet. If the soil has settled and created a low spot against the foundation, water will pond there and the foundation will see hydrostatic pressure it wasn’t designed for. Add compacted soil to restore the slope, not loose topsoil that will wash away in the first storm.
- Check every downspout. Downspouts on the addition should extend at least 5 feet from the foundation. Splash blocks help but they’re not enough for San Diego’s heavy rain events. Extend downspouts to daylight with rigid pipe, or bury them in a French drain system that discharges to a safe area. In our San Diego work, we’ve seen several additions where a downspout discharged right at the addition’s foundation corner, and the resulting soil saturation led to slab cracking within three years.
- Inspect any drainage swales or French drains. If your addition included a drainage swale, make sure it hasn’t been filled in by landscape work or compacted by foot traffic. French drains need their outlet checked for blockage. Leaves, silt, and soil wash through them during the first weeks of the wet season and can clog the outlet, rendering the whole system useless.
- Look at the original home’s gutters and drainage too. The addition’s roof often flows into the original home’s gutters. If those gutters were marginal before, they’re now oversubscribed. A gutter that overflows during heavy rain dumps water directly against the wall, and in San Diego’s concentrated wet season, that moisture stays in the wall long enough to start rot and mold. Clean gutters before the first rain and check them again after the first big storm.
- Check for water staining on foundation walls after each major rain. Efflorescence, which is a white chalky mineral deposit, or dark staining on the addition’s foundation wall indicates water wicking through the concrete. One light stain is a warning. Recurring staining means the drainage fix hasn’t worked and you need a professional evaluation.
What to Photograph and File After Construction Ends
A warranty is only as good as your documentation. Most San Diego home addition warranties, including our 365-Day Done Right Promise at Seedling ADU San Diego, cover workmanship for a defined period after completion. But a warranty claim is a conversation, and that conversation goes differently when you have photos. Here’s what to document, and when.
The most important principle: photograph the condition at handover, then photograph again at every inspection interval after. The gap between the photos tells the story.
- Photograph every exterior wall, every elevation, on handover day. Stand at each corner and shoot a straight-on image of each wall in good light. These photos establish the baseline condition: the paint, caulk joints, flashing, and drainage features as they existed when the crew left.
- Photograph all caulk joints specifically. Zoom in on window perimeters, door frames, and the stucco-to-trim transitions. These are the joints that will move first. A macro shot of fresh caulk is your baseline for any future claim that the workmanship was defective from the start.
- Photograph the roof, including all penetrations and flashing. If you can safely access a viewing point from the ground or an upstairs window, document the roof surface, pipe boots, and edge flashing. Don’t walk on the roof for photos. If a drone is available, use it.
- Photograph the connection seam between the addition and the original home, inside and out. This is the highest-risk zone on the structure. A baseline photo of the exterior seam and the interior drywall at the seam makes future movement measurable.
- Photograph the drainage system. Every downspout, splash block, swale, and French drain outlet. If the drainage system is ever modified by a landscaper or a future homeowner, you’ll know.
- Create a digital folder with the date in the folder name. Store the photos in at least two locations: one local, one cloud. Label the files with dates and locations. This is the difference between a warranty claim that gets approved in a week and one that gets contested for months.
At Seedling ADU San Diego, we walk every family through this documentation process at handover. It’s part of the Cedarwell Care Promise that every project closes with: shoe covers and drop cloths used during construction, pet-safe products where there was a choice, and a clean-up photo before the crew leaves. The handover walk-through is when we point at each photographable item and explain what it will look like when it needs attention.
A Practical Year-Round Maintenance Schedule for San Diego
San Diego’s maintenance calendar follows two seasons: the dry season and the wet season. Here’s a structured schedule that spreads the work across the year so nothing piles up.
January through March (Wet Season, Post-Storm Checks)
- After each significant rain, check interior ceilings and walls, especially at the connection seam, for water stains or dampness.
- Inspect all exterior caulk joints for new gaps or shrinkage.
- Walk the perimeter and check that downspouts are still extending water away from the foundation.
- Look for standing water on low-slope roof areas 48 hours after rain stops.
- Check for efflorescence or staining on foundation walls.
April through June (Spring Recovery)
- Clean and inspect all exterior light fixtures, paying attention to coastal corrosion if you’re within a mile of the ocean.
- Probe any suspect wood with a screwdriver and replace rotted sections.
- Inspect window and door screens for damage; repair before the summer heat makes them essential.
- Check the weep screed at the bottom of stucco walls and clear any dirt or mulch that’s been built up against it.
- Look for termite activity, especially mud tubes on foundation walls or wood trim.
July through September (Dry Season Maintenance)
- Paint touch-up on any exposed wood, this is the best window for good curing, with low humidity and warm temperatures.
- Deep-clean exterior surfaces with a mild detergent; this removes the salt and debris film that holds moisture against the walls.
- Inspect and clean gutters, even though it rarely rains, because leaves accumulate and form clogs that will matter in November.
- Check all exhaust vent terminations for blockages: dryer vents, bathroom fans, kitchen hoods, and the addition’s HVAC intake and exhaust points.
October through December (Pre-Wet-Season Preparation)
- Complete the full drainage and grading checklist in October, before the first atmospheric river.
- Recaulk any joints that showed shrinkage during the spring inspection.
- Clean gutters and downspouts again, including the addition’s and the original home’s.
- Inspect the roof-to-wall flashing at the connection seam for lift, cracked sealant, or rust. This is the seam that takes the worst wet-season beating.
- Photograph everything one more time, so you have a fresh set of images going into the rainy months.
This schedule isn’t burdensome. Most of these checks take a few minutes each. The point is regularity. A San Diego home addition doesn’t need dramatic intervention; it needs consistent attention at the right moments.
Common Mistakes to Avoid
- Skipping the caulk check because it doesn’t rain much. Caulk degrades from UV and heat, not rain. By the time the wet season comes, the degraded caulk has been silently failing for months. Check it in dry weather.
- Treating the addition and the original home as one system. They’re connected but they move differently. The seam between them needs its own inspection schedule, not just a general home check.
- Ignoring low-slope roof drainage because the roof looks flat and calm. Low-slope roofs are the most common leak source on San Diego additions after year five. Standing water is a countdown, not an aesthetic issue.
- Relying on splash blocks instead of proper downspout extensions. A splash block moves water a few inches. San Diego’s atmospheric rivers move water in a current. Five feet minimum, preferably more.
- Waiting for symptoms before investigating. By the time you see a water stain on the ceiling or a musty smell, the moisture has been in the wall or roof assembly for weeks or months. Inspection is about catching the condition before it becomes the symptom.
- Failing to photograph the handover condition. Without baseline photos, you can’t prove what the addition looked like when it was new. The photo gap is the warranty gap.
- Assuming coastal homes have the same maintenance needs as inland homes. A home in Rancho Bernardo and a home in La Jolla have entirely different corrosion profiles. If you’re coastal, your maintenance calendar is heavier on metal inspections, and it runs every year without exception.
When to Call a Professional

Some maintenance items are genuinely DIY. Recaulking a window perimeter, cleaning a gutter, checking a downspout extension. But other conditions deserve a trained eye. Call a professional when you see a crack at the addition-to-home seam that’s wider than 1/8 inch or that’s actively growing. Call when you find standing water on a low-slope roof that doesn’t drain within 48 hours. Call when you probe wood and the screwdriver sinks in rather than resisting. Call when you see repeated efflorescence or staining on foundation walls, which means water is consistently moving through the concrete. And call if you’re unsure whether what you’re looking at is cosmetic or structural.
Seedling ADU San Diego offers free estimates for additions, ADUs, and garage conversions throughout San Diego. Call (858) 988-6447 and we’ll walk the property with you and tell you honestly what needs attention and what doesn’t. If you’re looking for a Home Addition Contractor in San Diego or exploring ADU Builders in San Diego, our team is available to answer questions.
Frequently Asked Questions
Recaulk every 2 to 3 years on south- and west-facing walls, and every 3 to 4 years on north- and east-facing walls. The UV intensity in San Diego breaks down exterior caulk faster than most manufacturers’ nominal 5-year claim suggests. Inspect annually and recaulk at the first sign of shrinkage or cracking.
The connection seam between the addition and the original home is the most common failure point after five years. It moves differently than either structure alone, and the caulk and flashing at that seam are the first things to open up. Regular inspection of this seam is the highest-return maintenance task you can do.
Yes. Additions within about one mile of the ocean experience accelerated corrosion on all exposed metal, including fixtures, fasteners, flashing, and HVAC condenser coils. Coastal additions need an annual corrosion inspection and more frequent metal protectant application. If you’re planning a coastal addition, consider materials designed for that environment. We’ve worked with Garage Conversion Contractor in San Diego projects using coastal-rated materials from brands like Boxabl and Tuff Shed that reduce the long-term corrosion load.
Hairline cracks under 1/16 inch are typically normal settling. Cracks wider than 1/8 inch, cracks that run diagonally across a wall, or cracks that grow over time indicate a structural issue that needs professional evaluation. The difference is usually measurable: mark the ends of a crack with pencil, date the mark, and check it in three months. Movement past the mark means you should call a professional.
Photograph all four exterior elevations, every caulk joint, the roof surface and flashing, the connection seam inside and out, and the full drainage system. Store the photos in a dated digital folder with at least one cloud backup. These baseline images are what make a warranty claim provable rather than disputed.
We walk every client through a handover inspection at the end of each project, including the documentation checklist and the first-year maintenance schedule. If something isn’t right within the first year, the 365-Day Done Right Promise covers it. Beyond that, we’re available by phone to walk homeowners through what they’re seeing, and we offer free estimates for any repair or addition work in San Diego. Explore more guides & resources on our blog. Call (858) 988-6447 to ask about your specific situation.
The Bottom Line
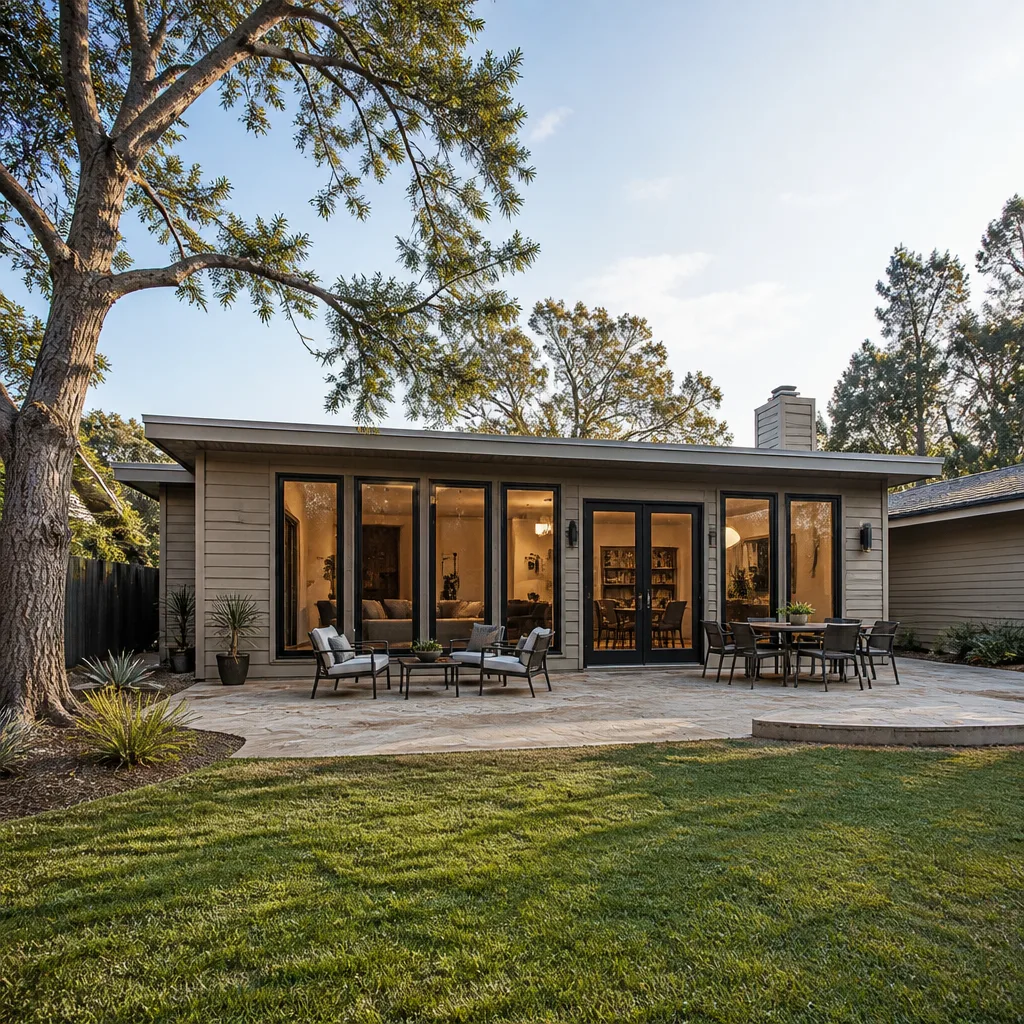
Your San Diego home addition is a new structure with its own maintenance profile. The maintenance that matters here is specific: UV-driven caulk failure, salt-air corrosion in coastal areas, the connection seam’s differential movement, and concentrated wet-season drainage demands. Organize your checklist by material and inspect on a regular schedule, not a reactive one. Photograph everything at handover and again at each inspection, so any warranty claim is documented from the start. You can also explore Seedling ADU San Diego home for additional resources. If you’d rather have a professional walk the property and point at exactly what needs attention, we’re happy to help.
Written by Ben Ortega, Owner at Seedling ADU San Diego, serving San Diego since 2001.